A clavicle fracture is a phenomenon common in all age categories of people. In newborns, such injury is caused by rapid labor or incorrect actions of obstetricians. In adolescents and adults, it can be caused by a fall on the shoulder or a strong blow to the collarbone.
If it so happens that the patient has a fractured collarbone, then he urgently needs first aid and referral to a traumatologist. The main method of treatment is to restore the integrity of bone fragments. The patient may undergo plaster immobilization for a clavicle fracture or a tight bandage. The choice of treatment depends on the complexity of the fracture, so it is important to classify it correctly.
How to determine a clavicle fracture?
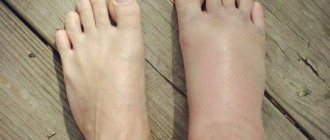
The clinical manifestations of a clavicle fracture can be determined visually if there is a noticeable deviation from the natural state of the bone. The main symptom that worries the patient is pain in the shoulder area. Any movement causes severe pain in a person. In addition, the patient experiences severe swelling or swelling in the forearm area, which clearly indicates a problem.
If such signs appear, then you urgently need to contact a traumatologist; he will be able to accurately diagnose and carry out all the necessary immobilization measures for a clavicle fracture or bruise.
Classification
Depending on the area in which the fracture occurred, clavicle fractures are divided into several types:
- injury to the inner third of the bone or sternal end;
- injury to the middle third or diaphyseal fracture;
- fracture of the acromial end or injury to the outer third.
The second type is considered the most typical.
Depending on the nature of the fracture, there are the following types of clavicle fracture:
- transverse, when the bone breaks transversely, dividing into two blunt limbs;
- longitudinal, when the fracture runs along the bone;
- oblique - the fracture occurs at an angle, and as a result the bone is divided into two parts with sharp ends;
- spiral fault;
- comminuted, when the bone is broken into several pieces.
Also, fractures are closed when the skin is not damaged. Or open - with violations of the integrity of the skin.
There are many types of clavicle fractures, but 80 percent of patients experience the diaphyseal type, which is located in the middle third of the long bone. What immobilization is performed for a clavicle fracture?
First aid for a broken collarbone
A clavicle fracture is a serious problem that cannot be dealt with at home. But competently provided first aid will reduce the likelihood of complications and shorten the recovery period.
If the first signs of a collarbone fracture appear, it is better to keep your hand pressed to your body. If the patient feels pain in this position, then it is better to leave it in the position in which the discomfort is minimal.
The patient must be given an anesthetic. This may be a non-steroidal anti-inflammatory drug, such as Analgin, Ketanov, Ibufen and others.
Also, in case of a clavicle fracture, immobilization is performed, which is the key to a speedy recovery.
Primary immobilization is called temporary and is done in order to reduce pain and avoid serious complications. There are many ways, but it is important to know: the longer the bandage is on the patient, the weaker its supporting function becomes. That is why during long-term transportation you should rewind the bandage from time to time to improve the degree of fixation.
Transport immobilization for upper limb injuries
Immobilization for bone fractures
Materials and tools
Transport (standard) Kramer splints (60×8 cm – 4 pcs. 110×11 cm), Dieterichs, pneumatic, wooden shield, cotton-gauze or pneumatic collar, Delbe rings, surgical scissors, sterile placement with the necessary instruments and dressings ( for wound treatment), waterproof bag or container (for disposal of class B waste), antiseptic solution (for hand treatment), disinfectant, analgesics as prescribed by a doctor, bandages (medium, wide), medical cotton wool, gauze, scarf, medical oilcloth, sterile dressing material, adhesive plaster, non-sterile gloves, belt (for fixing the thighs).
Immobilization for bone fractures is carried out in order to immobilize the damaged part of the body, prevent displacement of fragments and damage to blood vessels, the peripheral and central nervous system, internal organs and soft tissues.
In the absence of standard splints, immobilization can be performed using improvised means.
Before and after the procedure, it is necessary to perform hand hygiene.
During the procedure, be sure to use gloves.
When transport immobilization, it is necessary to be guided by general principles:
– The splint should be applied directly at the scene of the incident.
– The splint must cover two joints (above and below the fracture site); if the shoulder and hip are damaged, three joints.
– Before applying hard splints, they should be wrapped in cotton wool, secured with a bandage, or a washable fabric cover should be placed over standard splints.
– If it is impossible to remove the victim’s clothes, you should not try to do so. To inspect the damage, you should cut it at the seams.
Before applying a splint, if possible, the injured limb should be given an average physiological position.
When this is not possible, it is necessary to give a position in which the limb would be least injured.
The splint should be simulated by applying it to an uninjured limb or to the limb of a healthy person who has the same height.
Reduction of fragments is not carried out in open fractures. In this case, bleeding should be stopped using temporary methods.
It is necessary to apply a sterile bandage, while fixing the limb in the position in which it is located.
Simple and effective dressings
There are several methods of immobilization for a clavicle fracture:
- Delbe rings. You can make such a retainer using improvised means, such as a towel or shirt. Two rings need to be formed around the forearms. They should fit snugly against the skin, but not squeeze. In the back area, a bandage is passed through the rings, which will help to properly tighten the bandage until the patient himself says that the pain syndrome has decreased to a minimum. This method will allow you to separate the debris and relieve pain. But this method also has its drawback - it does not allow you to raise your forearms.
- Figure 8 shaped headband. This method, like the first, helps to separate the shoulder girdles, but it also requires additional support bandage. You need to start knitting it by applying three rounds for fixation, which are located at chest level. While the gauze is passing through the back, soft pillows are placed in the armpits at the level of the shoulder blades. After they are fixed, you can proceed to the bandage itself. When the bandage comes out to the front of the body, it should not cross the chest, but go to the armpit area, again going to the back. As a result, it turns out that the patient was wearing a vest. The bandage should be done tightly to spread the shoulders as much as possible so that the patient is comfortable.
- Headband. This method is the simplest and most accessible, but only it will not allow immobilization in case of a clavicle fracture in an extended form and will not allow reliable fixation. This type of brace helps elevate the arm and prevent it from sagging. In this case, the muscles in the collarbone area do not tighten and do not provoke separation of bone fragments.
- Deso bandage. It can be done with a simple or elastic bandage. In the chest area it is necessary to fix a couple of pillows, wrapping them with a bandage, and then from the armpit of the healthy arm the bandage goes to the patient’s shoulder and is thrown over it, and then passes down the back to the elbow, goes around it and follows to the armpit of the healthy arm. He moves to his back obliquely and again goes around the sore forearm, but only from behind and forward. Then the bandage goes again to the elbow, but from the front side of the body, again goes under the elbow and to the armpit of the healthy arm. At the end, you need to make another turn around the body and the pressed shoulder and return to the starting point. If you repeat this sequence again, you can perform even better immobilization of the upper limbs in case of a clavicle fracture. You can purchase such a bandage ready-made.
- Velpeau bandage. You need to arm yourself with a bandage, place your sore hand on your healthy shoulder at an angle of 45 degrees. You should start applying the bandage from the middle of the shoulder of the sore arm. Along the front side of the body, the bandage passes to the opposite side and extends onto the back. Do this a couple of times, then from the back, throw the bandage onto the front side over the shoulder of the sore arm, over the elbow, then onto the side of the healthy arm. Next it passes along the back and again on the forearm of the injured limb. In this way, it is possible to securely fix the loop on the shoulder and prevent it from moving. Carry out two or three such cycles, and effective immobilization for a clavicle fracture is carried out.
OMZ Gomonchuk / immm
The basic principles
of transport immobilization are as follows
- the splint must cover two joints (above and below the fracture), and sometimes three joints (for fractures of the hip, shoulder);
- when immobilizing a limb, it is necessary, if possible, to give it a physiological position, and if this is not possible, then a position in which the limb is least injured;
- cannot be applied to closed fractures tough
splint directly on the body, you need to place a soft pad (cotton wool, towel, etc.) or put the splint on clothing. In case of open fractures, the fragments are not reduced; a sterile bandage is applied and the limb is fixed in the position in which it was at the time of injury;
- Before application, the splint must be modulated according to the size and shape of the limb on yourself or another healthy person, or, in extreme cases, on the healthy limb of the victim. Poor modulation of the splint will not allow it to be reliably and firmly attached to the injured limb;
- a splint made accordingly (curved, wrapped in cotton wool) should be tightly attached to the damaged part of the body and form with it, as it were, one motionless whole. This strengthening is best achieved by using gauze bandages, and in extreme cases - scarves, scarves, strips of linen, ropes, belts, etc. The splint must be applied very carefully, without causing unnecessary pain and without causing additional damage;
An assistant should hold the injured limb while transferring the patient from the stretcher. It must be remembered that improperly performed immobilization can cause harm as a result of additional trauma. Thus, insufficient immobilization of a closed fracture can turn it into an open one and thereby aggravate the injury and worsen the outcome.
Immobilization for head, neck and spine injuries.
head
injuries (skull and brain), immobilization is aimed not so much at giving it a stationary position, which is not even desirable (possibility of suffocation during vomiting), but at eliminating shocks and preventing additional head contusion along the way. Indications for immobilization are all penetrating wounds of the skull and brain, bruises and concussions accompanied by loss of consciousness.
When providing first aid to a victim with damage to the soft tissues of the head
necessary:
- apply a pressure aseptic bandage, and in case of massive bleeding, press the artery along its length;
- ensure an elevated head position. Relative head immobility during the transportation
This is achieved by placing the head on a prepared cotton-gauze circle. It can be made from a blanket, clothing, cotton wool, or use a slightly inflated backing rubber circle, a car inner tube.
First aid for concussion, bruises and compression of the brain
is to create peace. If there is a disturbance of consciousness, the victim is carefully placed on his side to prevent retraction of the tongue or aspiration of saliva and vomit. The victim is transported on a stretcher, lying on his side. To transport seriously ill patients with bruises and compression of the brain, a shield and stretcher are used. Good transport immobilization of the head is provided with the help of stair splints. Immobilization of the head can be achieved using the above-mentioned available means.
For fractures of the arch bones
and
the base of the victim’s skull
is placed on a stretcher, a soft bedding with a depression is placed under the head, and soft cushions made of clothing are placed on the sides, or a pillow (cotton-gauze circle) is used.
Immobilization is achieved simply, quickly and quite perfectly with N.N. Elansky’s plywood splint, consisting of two halves fastened with leather or metal loops, which makes it possible to fold it during transportation.
The purpose of transport immobilization in wounded patients with suspected spinal injury
consists, first of all, of eliminating the possibility of displacement of the vertebrae and unloading the spine.
A dangerous complication of such injuries is spinal cord damage. It can occur as a result of displacement of the vertebrae, both at the time of injury and subsequently during transportation. Such a victim should not be turned unless absolutely necessary.
. If there is a wound in the area of the spinal fracture, it is covered with a sterile bandage. The victim is carefully, avoiding flexion of the spinal column, placed on a stretcher with a standard or improvised shield (a plywood shield or board wrapped in a blanket, etc. is placed) and the wounded person is fixed to the stretcher.
For fractures of the spine in the thoracic and lumbar regions, the victim is placed on a backboard with his stomach down, and for fractures in the cervical region - on his back. If there is no shield, the victim is placed on his stomach.
In case of damage to the cervical spine
In addition, you should apply a “collar” using a cotton-gauze bandage. To do this, the bandage is applied in such a way that it does not compress the neck and is supported by the external occipital protrusion, both mastoid processes, and rests against the chest from below.
Affected with maxillofacial trauma
during transportation, they are placed on their stomach, their head is turned to the side.
Immobilization for fractures of the clavicle and ribs.
For a
clavicle
:
— place a cotton-gauze pad into the armpit;
- give the hand an average physiological position;
- bandage the arm to the body, or apply a scarf, or apply two cotton-gauze rings to the area of the shoulder girdle, move both shoulder joints as far back as possible and fix them in this position, tying the rings on the back;
- administer an anesthetic;
- evacuate in a sitting position.
Rib fractures
sometimes complicated by damage to the pleura and lung due to the end of a displaced fragment. These injuries may be accompanied by pneumothorax, hemothorax, and subcutaneous emphysema. With severe injuries, pleuropulmonary shock occurs. When providing first aid you must:
- administer an anesthetic;
- apply a tight circular bandage to the chest, making the first moves of the bandage at the height of exhalation; or wrap the chest with a towel and sew it up;
- evacuate the victim in a half-sitting position.
Transport immobilization for injuries of the upper extremities
. When applying transport splints, the upper limb is usually given a certain position: the arm is slightly abducted at the shoulder joint and bent at the elbow at a right angle; the palm in most cases faces the stomach; the hand is slightly bent towards the back, the fingers are half-bent, for which a bandage or a thick ball of cotton wool wrapped in gauze is placed in the patient’s palm, which the victim grabs with his fingers.
To immobilize fractures of the upper limb, it is best to use standard wire splints (Kramer). However, in the absence of these splints, you can use improvised splints and, as a last resort, hang the injured arm on a scarf (for fractures of the bones of the hand and forearm) or bandage it to the body (for fractures of the shoulder).
For a fracture of the humerus
immobilization is carried out as follows. The hand is in the position described above. A cotton roll is inserted into the armpit, which is secured with a bandage through the shoulder girdle of the healthy arm. It is also advisable to place cotton pads around the chest and on the back of the neck. A long and wide Kramer splint is bent according to the size and contours of the injured arm so that the splint starts from the shoulder joint of the healthy arm, lies on the back in the suprascapular region, on the posterior surface of the shoulder and forearm and ends at the base of the fingers, i.e. covered the entire limb (if the length of the Kramer splint turns out to be insufficient, the forearm is placed on an additional small splint, firmly attached to the main one and serving as its continuation. At the corners of the upper end of the wire splint, two pieces of bandage about 1 m long are tied. After covering the splint with cotton wool, it is bandaged to the arm and partially to the torso. Attached to the upper end of the splint, two pieces of bandage are passed in front and behind the healthy shoulder joint and tied to the lower end of the splint. The arm is suspended on a scarf or bandaged to the torso.
When immobilizing using improvised means
(sticks, bundles of straw, branches, planks, etc.) certain conditions must be met: the upper end of the splint on the inside of the arm must reach the armpit, the upper end of the splint on the outside of the arm must protrude beyond the shoulder joint, and the lower ends of the inner and the outer tire - by the elbow. After applying the splints, they are tied below and above the fracture site to the humerus, and the forearm is suspended on a scarf. If there is no splint or improvised means for immobilization nearby, then the injured arm is suspended on a scarf and bandaged to the body.
Immobilization for
forearm fractures
.
— prepare a splint for a healthy limb; bend the splint at the elbow at a right angle; wrap the splint in cotton wool and bandage the cotton pad with a bandage;
— place a cotton-gauze roll under the brush;
— apply a splint over clothing from the fingertips to the middle third of the shoulder, i.e., fix the wrist and elbow joints;
- bandage the splint tightly to the injured limb;
- secure the injured limb with a scarf;
- administer an anesthetic.
Immobilization for damage to the bones of the hand and fingers.
The injured hand is placed in the position described above, palm down. A splint in the form of a groove is made from a Kramer splint or mesh splints, the length from the elbow joint to the ends of the fingers (it is better if the splint extends slightly beyond them). A cotton bedding is placed in the prepared gutter, and the patient squeezes a dense cotton-gauze lump with a damaged hand. The splint is placed on the palmar surface of the limb, and in case of significant damage, a splint is added to the back side. They are firmly bandaged, and the hand is suspended on a scarf.
Transport immobilization for injuries of the lower extremities.
The best immobilization
for hip fractures
is achieved by applying special transport splints, in which fixation is combined with simultaneous traction of the limb. For this purpose, the Dieterichs transport tire is most often used. It consists of two sliding wooden splints: a shorter one for the inner thigh, and a longer one for the outer surface of the thigh. The upper ends of the splint have spade-shaped extensions (periosteals) for support in the armpit and groin area. A transverse board with a central round hole for passing the twist and a side hole for securing the outer tire is attached to the short tire using hinges. In addition, the Dieterichs splint has a wooden sole with two side metal brackets through which the lower ends of the inner and outer splints are passed. A cord with a twist is attached to the sole, designed for stretching. In the absence of a Dieterichs splint, limb immobilization for hip fractures is carried out using 2–3 Kramer ladder splints, the ends of which are firmly tied or improvised material is used. Such an elongated splint is initially applied from the axillary cavity along the outer (lateral) surface of the torso and lower limb to the plantar surface of the foot, where two angular bends of the splint are made (in the form of a horseshoe) and then it is laid along the inner surface of the affected limb, bringing it to the perineum. Additionally, another Kramer splint is placed along the back of the thigh from the toes to the shoulder blade. The applied splints are secured by tightly bandaging them to the lower limb and torso.
With a fracture of the leg bones
:
- adjust three Kramer splints on a healthy limb (two splints are applied to the inner and outer surfaces of the lower limb from the upper third of the thigh to the foot, the third - from the upper third of the thigh to the tips of the fingers along the back surface, and its end is bent with a horseshoe to cover the foot);
- wrap the splint in cotton wool and bandage the cotton wool with a wide bandage; in order to prevent bedsores, it is necessary to place cotton-gauze pads at the level of the ankles and heels;
- give the injured limb an average physiological position: bend the knee joint at an angle of 130°, the foot in relation to the shin should be at an angle of 90°;
— apply splints over clothing so that the knee and ankle joints are fixed;
- bandage the splint to the injured limb;
- administer an anesthetic.
Immobilization for foot fractures.
A Kramer splint or mesh splint is bent at a right angle, bent along the contours of the back surface of the shin and, if possible, given the shape of a groove. The length of the splint is from the upper third of the shin to the ends of the toes. A cotton bedding is placed in the gutter. The splint is bandaged to the damaged leg along its posterior and plantar surface.
Immobilization of bone injuries of the pelvis
- a difficult task, since even involuntary movements of the lower extremities can cause displacement of fragments.
For immobilization in case of damage to the pelvis, the victim is placed on his back on a rigid stretcher, giving him a position with semi-bent and slightly apart limbs (put rolled-up clothes or a folded blanket under the knee joints), which allows you to relax the muscles and reduces pain. Forced adduction or abduction of the hips should not be done - they are given the most comfortable position for the victim, the so-called. "frog position" It is advisable to moderately tighten the pelvis with a wide (20 cm - 30 cm) strip of fabric.
3
Treatment of a clavicle fracture
The choice of treatment for a clavicle fracture depends on the patient's age, but in no case should therapy be carried out at home. In newborns and children under three years of age, treatment of clavicle injury is easy and quick with minimal intervention from a traumatologist.
For those children who are over three years old, the bones will fuse for at least six months. That is why it is recommended to apply a plaster cast, but the victim is first given painkillers.
A much more complex case is possible, when surgery cannot be avoided. Its essence is to apply a special metal structure, which will allow for reliable transport immobilization in case of a displaced clavicle fracture. With its help, you can completely eliminate the displacement of fragments.
Osteosynthesis is carried out with screws or plates. The doctor decides what to use in a particular case, based on the nature of the fracture, because it can be closed or open.
In some cases, immobilization is performed with a Kramer splint for a clavicle fracture. It is an aluminum ladder that bends perfectly, so it perfectly follows the contours of the body and helps to more reliably fix a fracture not only of the forearm, but also of other bones of the body.
Causes of clavicle fracture
The most common cause of a clavicle fracture is trauma. Typically, a clavicle injury develops due to:
- direct impact - impact;
- indirect impact - fall.
Sometimes bone damage occurs as a result of tissue erosion by metastases of a malignant tumor.
As a result of increased tone of the muscles that are attached to the collarbone, displacement of fragments is characteristic.
How to treat a displaced fracture?
What to do if the clavicle is broken with displacement? The first step is to properly immobilize. In case of a displaced clavicle fracture, the arm is completely immobilized and the main symptoms are determined.
After confirming the diagnosis, the traumatologist applies a bandage, which is securely fixed with plaster. But this can only be done when the doctor puts all the pieces in place, adjusting them by pulling the shoulder back. But only an experienced doctor should carry out this procedure; self-medication in this case can only cause harm. Only after this is a bandage applied.
If the bone is broken in several places and there are many pieces, then in this case, transport immobilization for a clavicle fracture involves the application of a special splint so that eventually all the bones heal correctly. This procedure should be carried out if the usual tight bandage did not help and the blood vessels and nerve endings were damaged. Proper therapy involves recovery for seven weeks, after which all symptoms will go away.
Figure eight bandage for fracture
OUR READERS RECOMMEND!
Our readers successfully use Artreid to treat joints. Seeing how popular this product is, we decided to bring it to your attention. Read more here...
A collarbone fracture can occur in the most unforeseen situations - a fall on the shoulder or an outstretched arm, as well as a severe bruise of the collarbone itself. This is a fairly common injury; newborn children can get it during childbirth, while adults most often encounter it in road accidents and when falling on ice. If you correctly apply a bandage or Delbe rings for a clavicle fracture, you can avoid unwanted consequences, and in some cases, save the life of the victim.
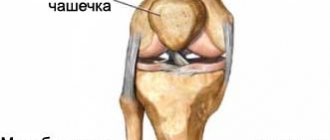
Danger of life-threatening injury
The danger of clavicle fractures for human life and health is associated with the anatomical structure of the bone, the muscles attached to it and the location of important arteries. So, there are 4 muscles attached to the collarbone, namely:
- Deltoid.
- Trapezoidal.
- Part of the pectoralis major muscle.
- The sternocleidomastoid muscle through its medial stalk.
The deltoid and trapezius muscles attach to the humeral end of the clavicle, while the other two muscles attach to its sternal end. If a fracture occurs, they begin to pull the fragments of the collarbone in their direction. This happens because these muscles have opposite centers of traction. As a result of this impact, a bone fracture is often accompanied by its displacement.
In addition to these muscles, another muscle, the subclavian muscle, fits tightly to the collarbone in front and behind. It does not affect the bone during a fracture and does not cause displacement, but due to the resulting fragments it can be injured.
Significant blood vessels pass near the collarbone, namely:
- vein;
- subclavian artery.
If these arteries are damaged, large amounts of blood leak into the nearby area. The skin and subcutaneous tissue in this area of the body are very elastic and can stretch greatly without preventing bleeding. Therefore, blood loss can reach volumes of several liters. Complicating the situation is the fact that this can happen in just a few minutes. This means that if the victim is not provided with medical assistance in time, there is a high probability of death.
Damage can affect not only the vessels, but also the trunk of the brachial plexus and its individual branches. Because of this, the victim may lose movement and sensitivity in those innervated segments.
The situation can be complicated by the fact that the blow that caused the fracture came from the front, which causes the sharp broken parts of the collarbone to move backward, leading to a rupture of the lung. Its upper pole is located just behind the bone in question. As a result of such a traumatic effect, the affected lung collapses and is excluded from the breathing process.
A symptom of this is the victim's severe shortness of breath, which can cause people around the victim to panic. The very fact of such a lesion does not lead to the death of the injured person, since the lost function of the affected organ is compensated by the second lung.
Basic rules of conduct
For those people who are close to an injured person, a natural question arises about the urgent and first rules for providing first aid to the victim. The algorithm for providing first aid for a clavicle fracture is as follows:
- It is necessary to administer analgin solution intramuscularly.
- Immobilize the arm on the side of the damaged bone using a bandage.
- Apply something cold to the fracture site, preferably a container of ice.
- Call an ambulance or transport the victim to an emergency room.
It is recommended to call an ambulance at the very beginning and, until it arrives at the scene of the incident, carry out procedures to relieve pain and immobilize the injured person. The lack of medical education does not allow you to correctly assess all the symptoms and apply the correct treatment.
Therefore, the sooner the victim gets into the hands of doctors, the better for his life and health.
If the injection, applying cold water and calling an ambulance are more or less clear, then the question of applying a bandage remains open. What kind of bandage should be used for a clavicle fracture and how to apply it correctly will be discussed below.
Dressings used
The main purpose of the bandage, which should be applied to the injured person with a fracture of the collarbone, is to immobilize the patient’s arm. This is necessary so that the broken bone fragments do not injure:
- Muscles that fit tightly to it.
- Blood vessels.
- Part of the lung.
For this purpose, the following types of dressings are applied:
- Velpo.
- In the form of a scarf.
- Delbe rings.
- Deso rings.
- Figure-of-eight bandage.
Finally, after a medical emergency, doctors tend to apply a cast to protect the fracture from re-dislodging.
Fixator and orthopedic reclinator
These fixatives are used in conjunction with conservative treatment. It consists of two rings that are put on the shoulder joints and which are pulled together quite tightly on the back. It can be purchased at a pharmacy; there are foreign and domestic samples, but if necessary, it is made at the scene of the incident from improvised materials.
You need to purchase this clamp only after the victim’s chest circumference has been measured, since the device is available in different sizes. The material used in the production of the product is soft but durable airtight material that has a long service life. The belts have adjustable tension levels, which allows you to adjust the fastener to each case.
The principle of its application is determined by the following factors:
- It spreads the shoulders, as a result of which it forcibly corrects the deformity of the vertebral region in the upper chest.
- Fixes the acromial clavicular joint.
- Relieves the ligaments of a broken bone.
The retainer is used in the following cases:
- If the ligaments in the acromial clavicular joint are damaged.
- If surgical intervention was used for damage to the collarbone.
- In the treatment of a clavicle fracture.
In addition, it is widely used to correct spinal curvature as an orthopedic reclinator. It is especially effective for correcting posture in children. The fixative purchased at the pharmacy is used as follows:
- A panel with a plastic ring is placed between the blades.
- The straps are wrapped around the shoulders and threaded through the ring.
- The straps are secured so that the shoulders are separated.
Important! The degree of fixation of the device is determined by the attending physician. He establishes both the order and timing of its wearing.
To maintain good hygiene, like any underwear, the retainer must be washed. To do this, you need to fasten all the fasteners on it, set the hand wash mode and the temperature to no higher than 30C. The powder used must be suitable for delicate washing. There is no need to wash anything else at the same time as the fixative.
DIY Delbe rings
In the event that you urgently need to provide assistance to the victim, and there is no commercially available fixative, you can make it yourself from available materials. To do this, you will need two cotton-gauze strands 3 cm wide. You can use strands made of dense material. Their length will have to be adjusted based on the volume of the victim’s chest. The main requirements for a homemade product are that it must be reliable and dense.
The procedure for using a homemade device is similar to the factory version:
- The victim is brought into a vertical position, his body straightens.
- The rings are put on the shoulder girdles and pass through the armpits.
- The formed rings are connected to each other on the back in the area between the shoulder blades.
- Cotton wool, gauze, and a napkin are placed under the resulting knot.
Before installing a homemade device, the victim must be completely removed from the body or left with only underwear.
Deso bandage
The above Deso bandage is often used to assist injured individuals due to its simplicity of design. To make it, it is enough to have an elastic bandage on hand. Such a retainer is applied as follows:
- First, several rounds are made to fixate at chest level. The bandage is passed through the armpit through the healthy side, then it secures the sore shoulder.
- From the armpit, the head of the bandage is directed to the shoulder girdle of the injured arm, around it and directed to the elbow.
- Going around the elbow, the bandage is returned to the armpit of the opposite side.
- Next, it is carried onto the back obliquely through the injured side, and then passes again through the shoulder girdle.
- Then the head of the bandage should be guided over the shoulder towards the elbow and through the back surface into the armpit of the healthy side.
To securely press the shoulder and fix the injured arm, you need to repeat these manipulations twice. The end result is that the arm is deprived of mobility because it is tightly pressed to the body.
The disadvantage of such a retainer is obvious - it does not have a spreading effect on the forearms. This means that its use does not help the bone fragments to be reduced.
In addition, a serious disadvantage of such a fixative is the need for preliminary preparation. It is difficult to secure it yourself; support for the injured limb is required.
Other types of fasteners
In some cases, a figure eight bandage may be used. It allows you to fix the shoulder girdles apart. Cotton pads should be placed and secured in the armpits. The retainer can be made using a bandage. It resembles a figure eight and runs through the back of the neck. Although it helps to spread the shoulders, the patient should feel comfortable. It is necessary to make an 8-shaped bandage using several rounds so that each subsequent layer of bandage or fabric overlaps the previous one by a third or half. This avoids squeezing.
To prevent displacement of bone fragments when providing first aid, you need to raise your arm and hold it in this position. A scarf is used as a retainer, which can be made of fabric or gauze with sides of at least 1 meter. It is made as follows:
- The fabric is folded twice diagonally, resulting in a triangle. This is a bandage that can be used to fix the arm.
- The wrist of the sore hand is covered by the larger side of the triangle, and the long ends formed are secured around the neck so as to create tension and the hand is suspended. There must be a right angle between the forearm and the humerus.
- The free edge of the scarf is folded over and secured with a pin on the surface of the homemade bandage either in front or behind.
By analogy with the Deso bandage, the Velpeau bandage can also be used, which has the same disadvantages. To make it, you need an elastic or simple bandage, with which the victim is bandaged as follows:
- The hand on the affected side is placed on the healthy shoulder girdle so that it is at an angle of 45 degrees to the shoulder.
- From the middle of the shoulder on the affected side, the bandage is passed along the surface of the body through the opposite side and further behind the back. This movement is repeated several times.
- At the end of the horizontal rewinding, the head of the bandage is passed from the back through the shoulder girdle of the injured side to the front surface of the shoulder.
- At the level of the middle of the shoulder, the bandage passes to the back of the shoulder and then follows through the elbow.
- From the elbow it is again led to the healthy side through the armpit, and then through the back the bandage again appears in front at the level of the middle of the shoulder on the injured side.
As a result of such manipulations, a loop appears on the shoulder, which is fixed with a bandage. Its head again needs to be directed through the healthy side to the back and to the affected shoulder girdle to repeat the cycle several times.
Conclusion
Timely use of such dressings can not only alleviate the suffering of the patient, but in some cases save his life. A secure fit prevents the movement of broken bone fragments, which could cause severe bleeding or a damaged lung.
Anyone can use the clamps described above. You can make them yourself using an elastic or simple bandage, gauze or thick fabric material. But in case of fractures, it is necessary to take the victim to a doctor as quickly as possible to provide him with qualified assistance.
Exercises to develop the collarbone after a fracture
The set of exercises after conservative therapy and surgical intervention is different, but in both cases the load increases gradually.
A set of exercises after surgery:
- breathing and toning gymnastics;
- light rocking of the shoulder joint, while the arm is in a bandage;
- alternately strain and then relax the muscles of the shoulder girdle and shoulder;
- active movements of the elbow joint and wrist, fingers and hand of the injured hand;
- forearm rotation;
- shrugs;
- strengthening complex for all muscles of the body;
- tonic walking and running;
- strength and speed exercises for the arms;
- gymnastics to restore coordination;
- active sports.
It is better to perform the first exercises with an assistant and only for a few minutes, and then constantly increase the time. They move from smooth and measured movements to more intense ones. To develop a collarbone after a fracture, you will have to put in a lot of effort and patience.
Treatment after a clavicle fracture
Clavicle fracture
is an injury most common in children and young adults. A fracture is usually caused by a direct blow to the collarbone area, strong compression of it, or a fall on the side on an outstretched arm, and the first place among the causes of fractures is taken by sports injuries and road accidents.
Clavicle fractures can be divided into groups depending on the location and the presence of fragments and displacement; further treatment depends on these factors. Complex fractures with fragments and displacements require surgery, but relatively simple closed fractures can be treated conservatively with fixation
and subsequent physical therapy. It is important to understand that the decision on the type of treatment and the choice of fixing bandage is made only by the doctor after a thorough examination and x-ray.
immobilization is sufficient to treat most clavicle fractures.
(immobilization) of the damaged area. In children, the elderly, and also in the case of a simple fracture, softer options are used instead of plaster: a bandage, an orthosis or a fixing bandage. Their task is to reliably limit the mobility of the shoulder girdle and ensure the correct position of the arm during the recovery period, without injuring the skin and soft tissues. A properly selected and applied bandage helps relieve pain - the shoulder muscles relax, and the bone fragments do not move and do not press anywhere.
Clavicle fracture in the elderly
It does not occur as often as in young people, but has more serious consequences. Due to the nature of regeneration after 50 years, doctors usually abandon traditional plaster, since such rigid fixation can cause arthrosis and also irritate surrounding tissues.
Clavicle fracture in children
sometimes called a “green stick fracture” - that is, bone fragments are held by the periosteum and therefore heal much faster, and fixation with such a fracture may not be absolute. For young children, a bandage or reclinator is also indicated instead of a cast.
Bandages and bandages are supportive
and
fixing
.
Gusset support
or a scarf bandage is usually used for first aid, as well as as an addition to a classic cast. It unloads the muscles and ligaments of the shoulder apparatus, relieves stress from the shoulder joint and scapula, and keeps the arm in the optimal position for recovery. However, the fixation when using such a bandage is not complete, therefore, for better healing during the rehabilitation period, other types of bandages are usually used - fixing ones.
the Deso bandage is most often used.
. Its prototype was invented back in the 18th century by the French doctor Pierre Dezo and the principle of operation has remained almost unchanged over the past centuries. The Dezo bandage firmly fixes the shoulder and forearm to the body and is used not only during the treatment of a fracture, but also during the rehabilitation and postoperative period.
In case of a more complex fracture, a figure-of-eight bandage or Delbe rings
. Delbe rings (orthopedic reclinators) are 2 belts crossed between the shoulder blades and threaded through one or more rings. This design allows you to adjust the size and tension of the belts. The reclinator fixes the shoulders in a divorced state, opens the shoulder blades, ensuring the correct position of the collarbone. The arm is not fixed in this type of bandage. Delbe rings can be worn under clothing, they are usually made of breathable material, and thanks to the soft lining they are comfortable to wear around the clock.
Modern versions of the Deso bandage and Delbe rings have several options for fixation and tension force and, in general, are a fairly simple design that does not require special knowledge and skill when putting them on. However, it is very important that the bandage is put on by a doctor for the first time (he will also determine how long the bandage should be worn).
If treatment begins on time and the patient follows all the doctor’s recommendations, the healing period after a clavicle fracture usually does not exceed 10 weeks for adults and 3 weeks for children. With a simple fracture, already on the 2nd day you can begin to gradually develop the hand, returning activity and blood circulation to the injured hand: bend and straighten your fingers, make light circular movements with your fingers and hand - no more than 2 minutes a day. At the same time, you should not strain the damaged area of the shoulder girdle and exercise through pain.
After the initial stage of rehabilitation, according to the doctor’s indications, the patient may be prescribed physical therapy
. Typically these are magnetic, ultrasound and high-frequency therapy procedures. It is also important to support your body with proper nutrition: eat more calcium (found in dairy products), vitamin D and C (fresh greens, legumes, berries). In rehabilitation, you need to do everything gradually, listening to yourself, your feelings and, of course, your treating specialist.
Therapeutic physical training for clavicle injury
A special treatment complex helps not only strengthen weak muscles, but also improves joint mobility and increases blood flow in the injured arm. Only constant active blood flow to the sore spot helps to recover faster. An important rule of exercise therapy is to strictly follow the sequence of loads and perform exercises regularly.
In fact, exercises begin to be performed already on the first day after transport immobilization in case of a fracture of both clavicles or just one. Exercise therapy copes well with frozen shoulder syndrome. As mentioned above, the exercises become more difficult gradually. Initially, the muscles of the hand are being developed:
- it is necessary to clench and unclench your fist, alternately hold your thumb in your hands or leave it outside;
- alternately connect the fingertips with the thumb;
- knock off the speck with each finger;
- twist each finger, and then the entire hand, clockwise;
- raise and lower the hand;
- swing the brush to the sides.
Then you need to start developing the elbow and shoulder.
After removing the bandage, you can perform the following complex:
- place your hands on your shoulders and lift each elbow alternately;
- rotate your elbows clockwise and counterclockwise;
- raise and lower the upper limbs;
- raising your hands, move them back;
- Do the scissors exercise with your arms straight.
The collarbone is a support for the arm; a powerful ligament apparatus is fixed on it. That is why its fracture can disable the arms. Only competent treatment will help avoid complications and irreversible consequences.
Consequences of a clavicle fracture
If you do not promptly seek qualified help and do not carry out transport immobilization for a clavicle fracture, then the patient may ultimately experience the following consequences:
- bleeding from the wound if the fracture is open;
- damage to soft tissues and nerve endings from bone fragments;
- damage to the nerve plexus;
- decreased or complete loss of sensitivity in the hand;
- paralysis of the upper limbs;
- formation of false joints;
- poor posture;
- development of arthrosis;
- wound suppuration after surgery;
- wound infection with an open fracture;
- shortening of the arm.
Only correct and timely immobilization will allow a patient who has broken the collarbone to quickly recover and return to their previous lifestyle. First aid is necessary in order to subsequently avoid serious complications.